Mjolnir MkV Build Guide
- josephaguilarsanch

- Oct 5, 2023
- 5 min read
Updated: Jan 31, 2024
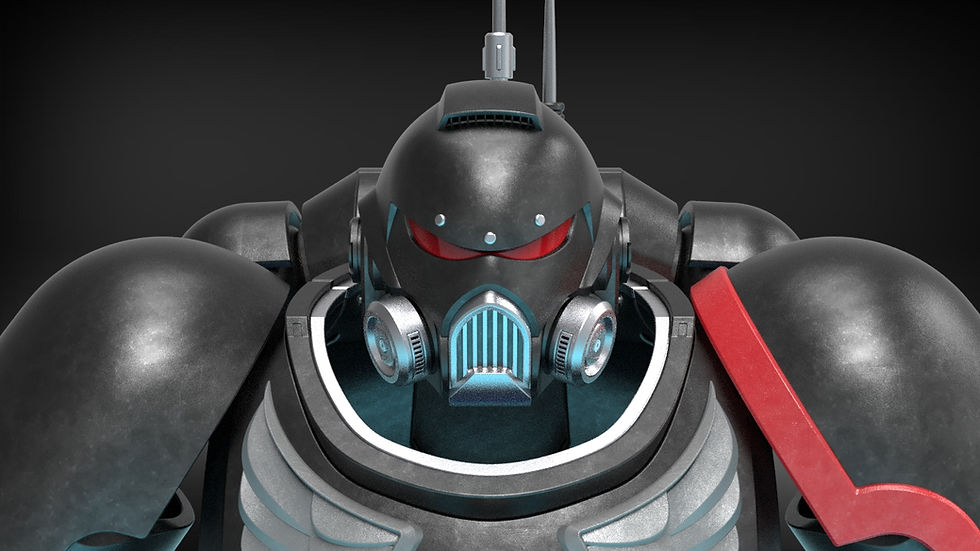
The helmet that started it all

The MkV comes with a suite of side attachments, full fan/speaker/lighting integration, multiple visor options and my unique multi-part design that allows for a quick and easy assembly process
For a full write up of all the features you can find them listed on the main product page.
This Build Guide will list the following:
Require materials to complete the project
Assembly videos to walk you through the assembly process
Recommendations for Print Settings/Orientations for certain pieces
Any additional questions you have concerning the building of this model can be sent directly to me via the contact page on my website
Build Requirements
Visor Requirements
Non-Required Hardware
2x 36 mm Speakers (Hobby speakers that can be powered/connected to the Bluetooth Reciever via a 3.5 mm jack)
Bluetooth Reciever w/ headphone jack (Allows helmet to connect to your phone/computer)
*All hardware will still fit in the helmet down to 90% scale*
Assembly Instructions:
This tutorial is broken into 3 separate parts
Bucket Assembly
- This will showcase how to assemble the base helmet and attach all types of attachments
Electronics Assembly
- This will showcase how to integrate all the optional electronics
Visor Fabrication
- This will have two different tutorials: a simple, template based visor and a full write up for vacuum forming and tinting your own visor
Bucket Assembly
The video below contains written text to illustrate how to put together the base helmet bucket.
*One additional note for inserting the magnets. Up to 3 Magnets can fit on each side of the main helmets magnet cavity. 1 Magnet can fit on each side of the neck seal's magnetc cavity. The Magnet cavity was upgraded to accomodate 3 magnets per side to help improve the magnetic seal on the neck seal.
Electronics Assembly
Below I will highlight all the compartments and accomodations for the various peripheral devices that can be added to the helmet. As a reminder, the helmet can be scaled all the way down to 90% and still fit all the peripherals mentioned in the parts list. All parts can be fastened with hot glue or doublesided adhesive tapes, velcro, etc.
Starting off, there is a large compartment in the back that can be used for a AA battery bank or general storage

Leading from that battery bank compartment are channels for wires to feed to the overhead blower fan or the side speakers.

The speaker fit inside a joint cavity comprised by the attachment plate and the neck base. If you only want to use speakers, the speakers themselves dont require external power. You can lead them straight to a bluetooth reciever which can be stored in the AA compartment or one of the side compartments that house the side lights.

These side compartments house the lighting places and have lots of available space for the on/off switches, additional small blower fans or as mentioned above, bluetooth recievers.

Lastly, There is an overhead fan compartment that vents air in or out from the top of the brim. This has wire channels leading to the rear battery bank and will prevent your visor from fogging.


Vacuum Formed Visor
The files include a 3D Printable Buck to allow those with experience in vacuum forming to produce 100% accurate visors. I will create a separate build guide in the near-future for those not experienced in vacuum forming. There are two bucks, one that include the visor detail, and simple "classic" buck that is completely smooth
General Printing Tips
I have a few printing tips to give on certain pieces to ensure that you get the best print quality. These are just recommendation and are by no means the only way that these parts can be printed.
The very first pieces to print of this helmet should absolutely be the sizing ring. They can be printed flat and only take 1-2 hours. In the long run this will likely save you hours if not days of printing when you can be sure that you will print the helmet at the correct scale the first time around. Keep scaling the rings up or down till you find your ideal fit and then scale the rest of the helmet to that scale. While there is a demo model that can be used for things like armor smith, this will also ensure that the opening of the helmet (before the neck seal is magnetically connected) can fit over your head. The "neck" of the sizing ring assembly is equal in shape and size to the opening of the helmet.
The pieces are not pre-oriented so you will have to adjust them to ensure they are in an orientation more optimally for printing (flat surfaces touching the build plate). Additionally, for pieces that have no ideal flat surface, I highly recommend using the Cylindric Custom Support downloadable plug-in for the Ultimaker Cura Slicer. It allows you to place custom supports on parts to ensure that you can get much safer and reliable prints on parts with odd geometries. Some of the examples below will show these custom supports, you will need to add them, or something similar to your own prints.
Optimal Print Orientation
Load Bearing Pegs
All Pegs should be printed as shown, this will ensure the layers aligned with their longitudinal axis and prevent Pegs shearing apart in the helmet pieces.

General Piece Orientation
The Main Bucket has a flat front face that the entire piece can be printed upon. In order to stabilize the print in this vertical orientation, I recommend placing custom supports in the manner shown below


The Neck Base is the piece that requires the most supports but the optimal print orientation is to set it upside down and place custom supports all along the bottom-most face


The Face Plate can be printed flat on its bottom, but to minimize supports, you can print it on the rear of the jaw. I like to put some custom supports along this buttom face and one that goes a bit up the jaw line to ensure it has enough stability to last until it connects to the other side. Make sure to put support blockers on the arch near the chin to reduce supports and print time.


The mandible plates dont have a flat face but can just be aligned with the build plate and aided with custom supports on the bottom face.


The mounth vents have a flat front face that can be used to print without any supports

The attachment plate has flat face near the speaker insert. Add some custom supports to support the base and it can be printed vertically to best preserve the details.


The Attachment Port and Attachment Port Open can be printed on their flat base

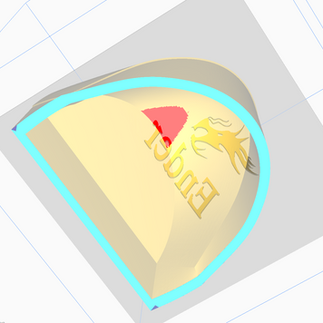
The Visor Brim has a flat rear face that can be aligned with the build plate

The Neck Seal has a flag face on its top face that can be aligned with the build plate

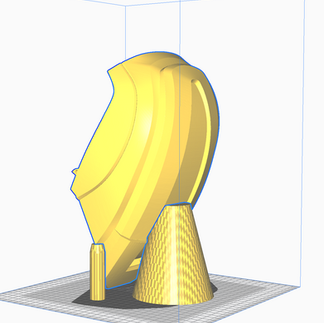
The visor buck has an obvious bottom face, but to reduce overall print time and material, it has been hollowed out. While there is some steep incline angles near the center of the print, this print can be printed without supports and will come out fine.