

Guardsman Armor Build Guide
- josephaguilarsanch

- Jan 9
- 5 min read
Imperial Guardsman Armor designed to keep you alive for at least 15 hours against the worst xenos and chaos the galaxy has to offer.

Full description and file set available on the main product page.
The Guardsman armor set features a fully modular helmet with side attachment support as well as a fully integrated rigging system.
This Build Guide will list the following:
Required materials to complete the project
Assembly videos to walk you through the assembly process
Recommendations for Print Settings/Orientations for certain pieces
Any additional questions you have concerning the building of this model can be sent directly to me via the contact page on my website
Build Requirements
All the requirements below assume printing around 100% scale. At 100% Scale, this armor is designed to fit a 6ft person.
Any 3D Printer with build volume as small as 250^3 mm.
All larger pieces come with sliced options that fit the above dimension. Depending on chosen print scale, some default pieces can be in the 300-350mm range.
Filament of your choice: (I prefer SUNLU PLA) - rough estimate of 5-6 kg for this armor.
Nylon Straps -
The entire armor set was designed to accommodate nylon straps to help fasten the armor to your body comfortably and securely. I included some links below to different straps/elastic/velcro I have used in the past for you to use for this project.
1.5" nylon straps (The Leg armor and Forearm plates can fit up to 1.5" nylon straps)
2" nylon straps (The Chest armors shoulder straps and abdominal plate can fit up to 2" straps)
1" elastic straps (The lower straps/belts on the torso armor as well as the hand armor can fit up to 1" straps)
Visor Requirements
The visor can either be printed using clear resin/filament or can be printed with regular PLA and used as a template to cut out visor from your desired visor material. The visor was designed to work as one flat curved piece so no vacuum forming is necessary.
Helmet Attachment Hardware: M5 bolts The side attachment included in the set is hollowed out to allow for the inclusion of any desired electronics but anything can be mounted using the slots in the side of the helmet, The slots are 6mm thick, so M5 bolts, nuts, washers etc. will allow you to mount your attachments to the helmet.
Helmet Assembly Instructions:
The video below will showcase the assembly of the helmet. Below that are written steps and tips that go along with assembly in the order of the pieces shown in the video. All Ornamentation shown must be glued to the surface of the base armor.
First you start with the main bucket, which by itself can serve as a standalone helmet.
Next the optional Cheek Guards can be held in place by the Cheek Guard Pins.
Once the Cheek Guards are in, the Face Plate can be inserted from inside the helmet and held in place via 7 Face Plate Pins. The Face Plate is placed after the Cheek Guard as a portion of the cheek guard helps holds up the Face Plate.
Either before or after inserting the Face Plate. Insert your chosen visor into the visor tabs on the face plate

Again, either before or after inserting the face plate, you can insert the air intake/filter into either side of the face plate. The outer sleeve is inserted via outside the helmet but the inner filter goes in through the inside. There is a gap to all airflow in through the filter as well as an inner cavity to insert any sort of filter material in the core of the filter.
Lastly you can place the intake port in the rear of the helmet. The opening is 15mm for whatever tubes or wires you are wanting to include in the helmet.
Attachment: The attachment itself is fairly simple with all the buttons/switches having dedicated depression for you to glue them. The body of the attachment is hollow to allow you to insert any electronics of your choice as well as having internal tabs that will allow you to insert your fastener bolts such that you can fasten the bolt head or nut on the inside of the helmet


Armor Assembly Instructions:
The armor itself is mostly straight forward as it is mostly comprised of singular pieces with dedicated channels for you to feed your straps through. But there are some details you should know.
The Chest Plate and Back Plate both contain inserts for all the Strap Pins. The Strap Pins are meant to be printed separately and glued in place such that the pins can be printed with additional infill and in an optimal orientation to ensure they have increased strength to hold the straps.
The Abdominal Plate straps to the bottom pins in the Chest Plate. This allows for some flexibility between the two plates.
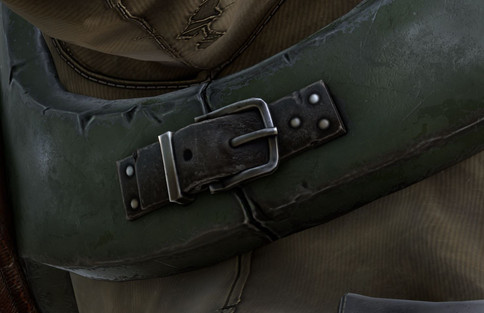
The chest plate is held to the back plate via straps over the shoulder and beneath the ribs. *See the two reference images


All of the arm/leg armor contains integrate strap channels for you to rig as you desire. The Strap sizes can be found in the Required Materials Section of this Post.


General Printing Tips
The pieces are not pre-oriented so you will have to adjust them to ensure they are in an orientation more optimally for printing (flat surfaces touching the build plate). Additionally, for pieces that have no ideal flat surface, I highly recommend using the Cylindric Custom Support downloadable plug-in for the Ultimaker Cura Slicer (or something similar). It allows you to place custom supports on parts to ensure that you can get much safer and reliable prints on parts with odd geometries. Some of the examples below will show these custom supports, you will need to add them, or something similar to your own prints.
Sizing Rings:
To assist with sizing the helmet, I included a sizing ring that should fit around your forehead right above the eye brow. This is the same size as the neck opening so if the ring fits above the eye brows than the entire helmet should fit as well.
Optimal Print Orientation
Load Bearing Pegs/Pins
All Pegs/Pins should be printed on their sides such that the layer lines align with the long axis of the pin, this will make them much less likely to snap off within the pieces due to any bending force. Additionally printing them at around 25-35% infill will ensure they do not snap and add some additional strength to the armor itself.
General Print Orientations
In general if you see any circular or semi-circular arcs on any of the prints, you can place a support blocker to reduce the overall number of supports. Arcs like that are typically self supporting and print find without supports.


